
One of the annual tasks that’s part of nearly every sheep farm’s annual ritual is shearing. Often, shearing the sheep on your farm will become an event. You might invite neighbors or kids to come and help out or observe the process. And the hard work you’ve done keeping your sheep’s fleece clean all winter will finally pay off. Today I’ll share a step-by-step guide that explains how to shear a sheep safely, and comfortably. I’ll also share some tips to avoid second cuts in your wool. And finally, I’ll tell you how I keep my back from being sore the next day.
The sheep shearing video included in this article shows every position to use as you shear a sheep. Keeping the animal comfortable and relaxed is key to making shearing easier on you, and on your flock.
Let’s get right into it!
Sheep Shearing Video Demonstration
In the high-quality sheep shearing video below, Mike Fournier from the Bucks County Penn State Extension demonstrates how to shear a sheep. This video provides step-by-step instructions for the six positions you must master. These positions will allow you to comfortably shear a sheep with minimal effort.
Learning these six shearing positions will allow you to keep the sheep safe and comfortable. These positions also let your legs do the work for you (saving your back).
I’ve also included an exciting bonus at the end of this post. It’s a complete step-by-step sheep shearing guide, detailing each of the 6 steps you’ll see in this video.
Buy the Oster Shears Mike is Using in this Video (or learn more when you Read Our Review)
The 6 Key Positions to Shearing a Sheep
Time needed: 15 minutes
How to Shear a Sheep (the 6 basic positions you need to master)
- Sit Sheep on its Rump
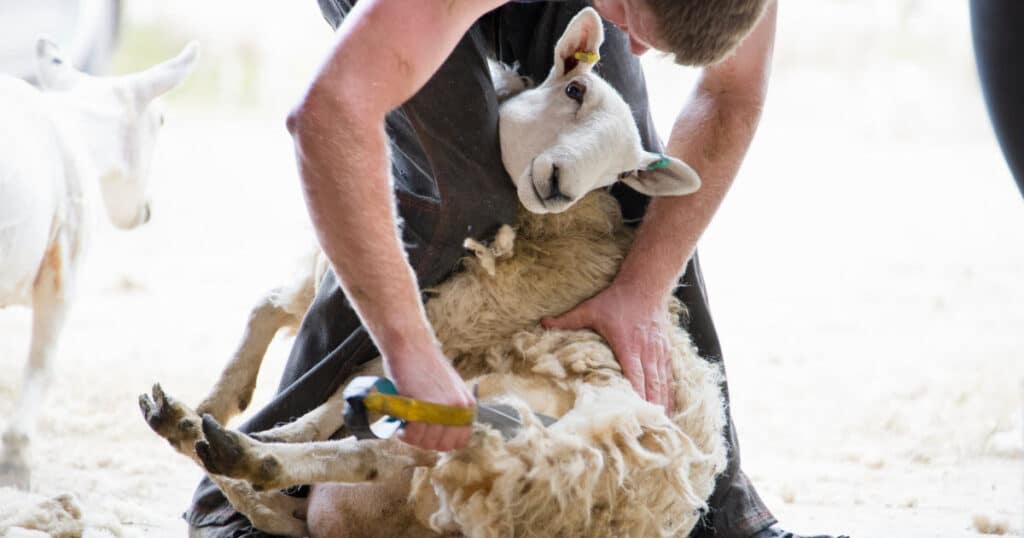
To get the sheep in this position stand by its side with your feet set wide apart on either side of its shoulder. Plant your feet and slip your left thumb into its mouth behind its incisors and in front of its molars, twisting its head firmly back toward its far shoulder. In the same motion push the sheep’s rump toward the ground with your right hand. When the sheep starts to sit down pull the sheep’s front legs up and sit it comfortably one one flank, holding its shoulders securely with your knees.
- Roll Sheep onto its Right Hip, Leaning Against Your Legs
After you’ve sheared its belly and between its legs, let the sheep sit back on its right hip, leaning against your legs as you support its shoulders with your knees. This will allow you to shear it’s left rear leg, from the hip to the tail all the way up to the spine. It’s important to bend from the waist to reach the sheep’s rump in this position so you do not injure your back.
- Sit Sheep Straight Up on its Rump
After you’ve finished shearing the sheep’s left rear leg sit it up straight on its rump, stepping between its legs with your right leg, the toe of your foot under its flank and locking your knee between the sheep’s breastbone and right foreleg. With your left leg support the sheep’s back so it feels secure and doesn’t struggle. This will allow you to shear the sheep’s neck and head.
- Lay Sheep on its Right Side
Once you’ve cleaned off the head, neck and left shoulder, keep your right foot exactly where it is but let the sheep’s front end down gently, stepping back with your left foot and supporting the sheep’s right shoulder. This will ensure that none of the sheep’s feet or legs touch the floor … very important as the sheep will struggle if it senses it can might be able to regain its footing. Once the sheep is in this position make long cuts along its side and back, continuing as far as you can reach without rolling the sheep so it can touch the ground with its feet. Try to make two full passes on the far side of the sheep’s back.
- Position Sheep on its Right Hip, Neck Bent Between Your Legs
From this position kick your right foot out around the fiber, pulling it back in toward the sheep’s body and then gently pull the sheep’s head up, bending her neck back across her left shoulder and holding the head in that position with your legs. In this position clean off the wool that remains on her head and begin working down her neck and right shoulder. After you’ve cleared the shoulder and front right leg, grip the sheep’s right elbow with your left hand to pull the skin taught and continue to support the sheep’s head and neck with your legs, bending your knees in around its body and pointing your toes in at an angle beneath the sheep’s hips.
- Move Sheep to its Left Hip, Keep Head and Legs in Front of You with the Sheep Leaning on Your Legs
In this final position you have a clear view of where you need to go to finish shearing the sheep. The right leg, hip and rump are the only areas which still have wool at this point. Shear the front of the right rear leg and then work down toward the rump and tail until you free the last of the wool from the sheep.
What’s Next?
When you’ve finished, gently stand the sheep up. Support the sheep with your free hand so he or she doesn’t slip and fall as it regains its footing. Then turn it back in with the rest of the flock.
Before releasing your sheep, remember that this is a great time to trim your sheep’s hooves, administer de-worming medication and take care of other routine maintenance while you have your hands on it.
Now that you know how to shear a sheep the next step is to practice, practice, practice. You can study this video a few times before you begin. Mike makes it look pretty easy, but expect to struggle, sweat and make a few mistakes.
Don’t worry about it! Keep a positive attitude, and practice the technique of these six positions even when it’s challenging. It won’t be long before you’re shearing like a pro and charging everyone in your county to shear their flock.
In the market for a good set of electric shears? We’ve reviewed a couple of our favorites right here.
Sheep Shearing Step-by-Step Guide (with pictures)
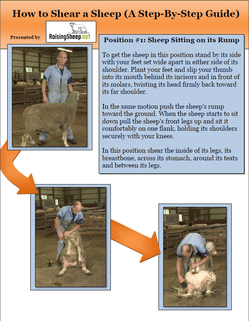
Good News: Because I know that a picture is worth a thousand words, I’ve put together a bonus.
This free step-by-step guide is a great resource to print off and use as a reference in the barn.
You are also welcome to share it with your local sheep club. Or use it as a reminder to make sure that you’re keeping Mike’s 6 steps in mind as you shear.
This helpful reference offers a step-by-step breakdown (with pictures) to remind you of the proper way to shear a sheep. Enjoy!
Special thanks to the Penn State College of Agriculture Sciences for creating such a helpful sheep shearing video!
Very good video.. explain sheep shearing..easy dtep by step
.Gracias….
You would do better to watch New Zealand shearing demos ,heck even I could shear that old girl in under 2 minuts and I can guarantee theres plenty of Kiwi shearers could finish in under a minute.
Still for an amatuer he didnt do too bad .
Well Bob. You should be watching a video on manors not sheep shearing. You are a pretty rude person. This gentleman is just showing how it’s done. Of course he’s going to move slow because he’s showing and explaining as he goes. He’s not in a shearing contest in his video, or were you not smart enough to figure that out?!
Well Raynay for starters he is poorly positioned and putting the sheep under more stress than necessary,and an electric handpiece is a poor substitute for a proper overhead stand .There are many videos on sheep shearing by people who shear 400+ per day that can show you how to shear far more efficiently ,like I said he is OK for an amateur but a guy like me who did this day in and day out for a living can show you an easir way to do it .
And “manors ” ? what do English houses have to do with anything ?
Tell me your credentials and maybe I will take you seriously ,myself I have shorn in NZ ,Australia and briefly in New Mexico ,my personal best is 520 lambs in 9 hours on cross bred lambs as part of a 4 stand team that shore 2243 for the day [ I was dragging the chain that day ].If you can better that then please do tell .
Well Bob, I’m going to be polite here. I owned a feed lot with 10,000 lambs in it. I have watched many “ professional” shearers come and go. I never allowed them to make a contest out of shearing my lambs properly and not cutting them to shreds. Yes, you may be one of the best the world has ever seen , but this gentleman was giving a basic lesson on how to learn how to sheer. Just like the Olympic Games, we can’t all make the team like you did. Nor do we all want to. We just want to raise sheep and enjoy our days on earth. It is much easier for me to pay you to work your butt off so I can use my time to do the things that make my business run smoothly. Thanks for doing what you do. Also, thanks to the gentleman at Penn State for making a video that will surly help a lot of people out.
Really useful video and demonstration! We’ve recently started a very small scale herd of sheep on our small-holding in Scotland, and I really want to shear my own sheep…not because I’m too cheap to pay someone or anything like that…but just because I think it’s a fun thing to be able to do. Unlike Bob, I have no desire to be a speed-shearer, so this demo is exactly what I need…so thank you from bonny Scotland 🙂