
If you’re new to spinning it can be a bit daunting to learn how to use a spinning wheel. Many communities have a local spinning or knitting group that you can use as a knowledge base, resource and it’s also a great place to make friends who share your interest – people who can offer invaluable advice in an informal, friendly setting. We hope to offer some useful insight in this article which will help you as you get started spinning wool from sheep.
In essence the art of spinning wool is a matter of twisting the fibers one on top of the next so that the natural tensile strength of the wool is enhanced by the fibers around it. Wool fibers naturally have small hooks which will link themselves together when spun thanks to the tension which develops as a result of twisting. A spinning wheel is simply a device which expedites the process of twisting wool fibers together to form yarn. Spinning wool at home can be a relaxing, enjoyable experience. The natural rhythms of the spinning wheel help many spinners feel connected to the rich history of men and women who have come before them and used the wool that their sheep have provided to produce warm, durable clothing.
READ: Best Spinning Wheel for Beginners
How to Use a Spinning Wheel Once Set Up is Complete
There are many different types of spinning wheels which range from the Prelude to the Kiwi to others which vary in size from a small to a large footprint.
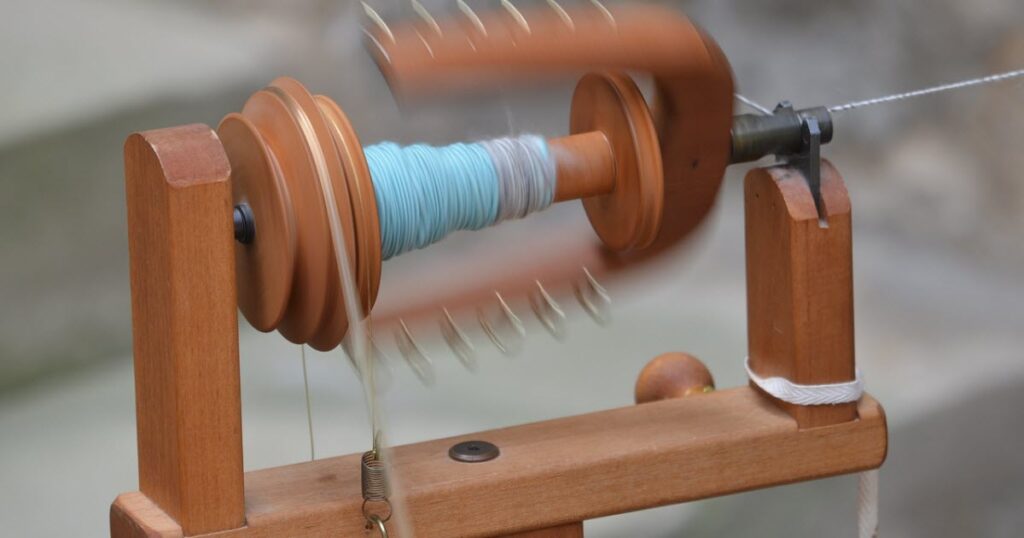
Several key components of all spinning wheels are the treadle (foot pedal), the maiden (frame surrounding the bobbin with a series of hooks) and the bobbin (which you will fill with yarn as you spin).

As you fill each bobbin with yarn you’ll replace it with a new bobbin and eventually you’ll remove your finished yarn and measure it by making it into skeins.
You’ll notice that the largest wheel (the drive wheel) of your spinning wheel is turned by the treadle and a good thing to practice before beginning is turning the wheel clockwise with the foot-pedal – making an effort to maintain a steady rhythm.
Which Way Should You Spin Your Wheel?
It’s important to always spin in the same direction when spinning your one-ply yarn (yarn spun directly from wool roving) … otherwise the yarn won’t be as strong if you spin (or twist) it in different directions. Some people will tell you one direction is better than the other, but the truth is that as long as you’re consistent when spinning your yarn (and you reverse directions when plying several pieces together), it doesn’t matter which way your spinning wheel is going. I prefer to go clockwise when spinning roving into yarn.
Setting Up Your Bobbin
Once you’ve gotten the hang of using the treadle to keep the large wheel spinning clockwise at a consistent rhythm you’ll have to install the empty bobbin on the spindle, replacing the metal shaft or spindle once the bobbin is in place. After the bobbin is in place adjust the tension of the apparatus which holds it in place so that it will stay seated properly during spinning.
Once the bobbin is set up you’ll prepare to spin your wool. If this is the first time you’ve set up a spinning wheel you’ll want to have a bit of yarn handy (no more than a yard or two). Tie this to the bobbin’s shaft and thread it through the hooks of the maiden back to the orifice (the small hole at the end of the bobbin facing you). Once you’ve threaded the starter-thread through you’re ready to begin spinning.
Starting your first bobbin is one of the most challenging aspects of how to set up a spinning wheel. Don’t get discouraged if you can’t get your wool roving to catch the starter thread right away. It happens to everyone!
How to Spin Your Roving
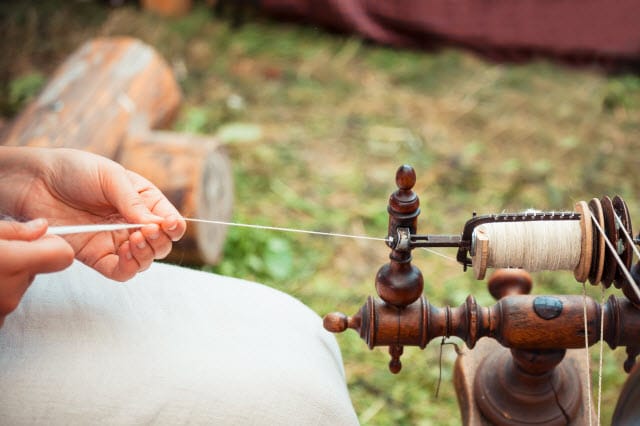
You’ll want to pull the end of your roving apart slightly (stretching the fibers out lengthwise). Overlap the extra starter yarn with the thin strands of wool fibers. Pinch the end of the wool to the starter yarn tightly and begin to turn the wheel. Pedal so the spinning wheel turns clockwise.
As the wheel turns the maiden will spin around the bobbin and this will create tension on the yarn. Hold on! As the tension increases the starter yarn will twist and if you gently release the tension with your front fingers. This allows you to support the wool and the balance of the starter yarn with your free hand. The twisted starter yarn will twist into the wool roving and you’ll be on your way.
It’s important to continue to stretch the wool fibers apart as you continue to feed your wool roving toward the wheel. This will help your yarn be a consistent thickness without large, uneven lumps.
Consistency is Key
The trick to producing an even, consistent well-spun yarn is consistency. Make an effort to learn a consistent treadle pace early. You want that part of the process to be automatic. This will free you up to focus on what your hands are doing.
The first couple of times it can be a challenge to get all parts of your body working in unison. Keep at it and before long you’ll be spinning beautiful, consistent yarn. You can then use your yarn to create beautiful wool clothing.
We hope this short article offers the basics of how to set up and how to use a spinning wheel. Best of luck and happy spinning!
Related: